In the last post I described how I tried to design the missing parts and figure out the axes of the gunblade using CAD - and failed. That was in May 2023, and looking back at my photos, I spent quite some time with the cardboard model, probably just staring at it most of the time. Yet, I always ended up with something not aligning the way it does in the reference artwork I used. Now you could argue that it's not relevant if the slot on part A actually aligns with the contour of part B, but I noticed they do in the artwork and in my imagination some designer at Square Enix intentionally made it so, so I should be able to get it right, as all the parts themselves were correct.
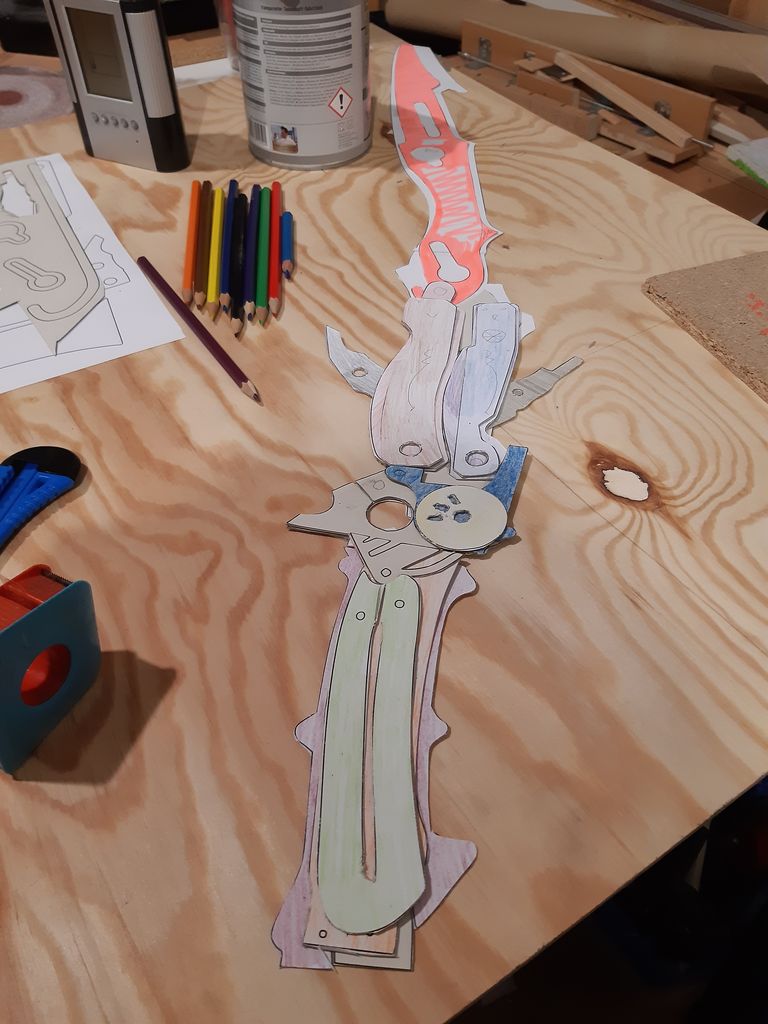
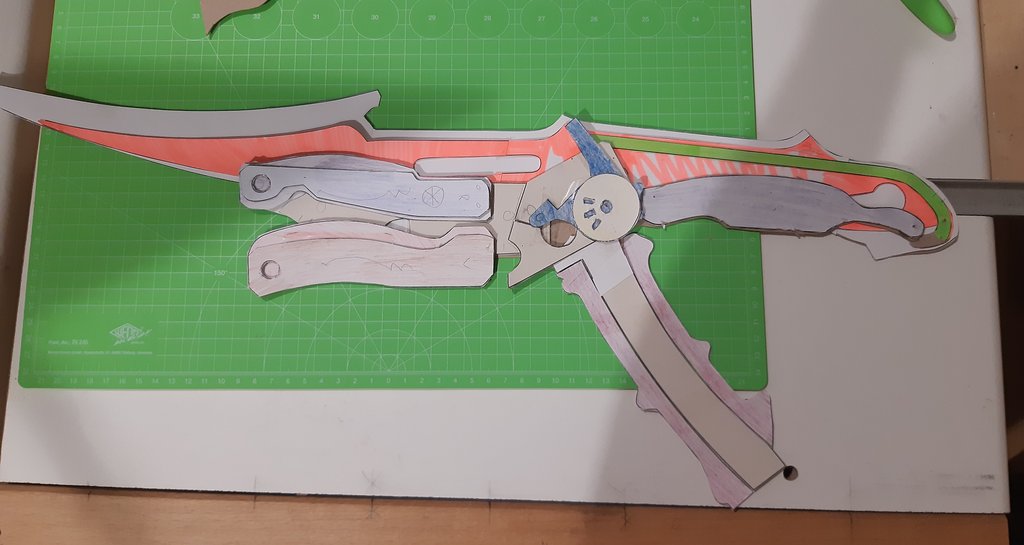 In July, I got it right. This photo shows the cardboard model with the aforementioned slot ligning up perfectly. Also, the light blue part on the right that almost reaches the thin green part is in the right position. In the artwork, it looks like the blue part is screwed onto the green part or something like that, so I wanted those to match and have an actual mechnical connection there.
At this point I got distracted. An invitation for a halloween party caused me to consider to make the project an actual cosplay. Skip to November and imagine me wearing my old white judo jacket with a chest belt and brown boots. I also bought some more leftover leather pieces from a shoemaker I had previously bought leather pieces from, this time brown shades instead of black. The costume will make for an own article - I learned a lot, I worked a lot and I actually created it. I did, however, forget the solution to my axes problem, as I had only documented my process in the form of photos and the photos only show that I had worked it out but not how.
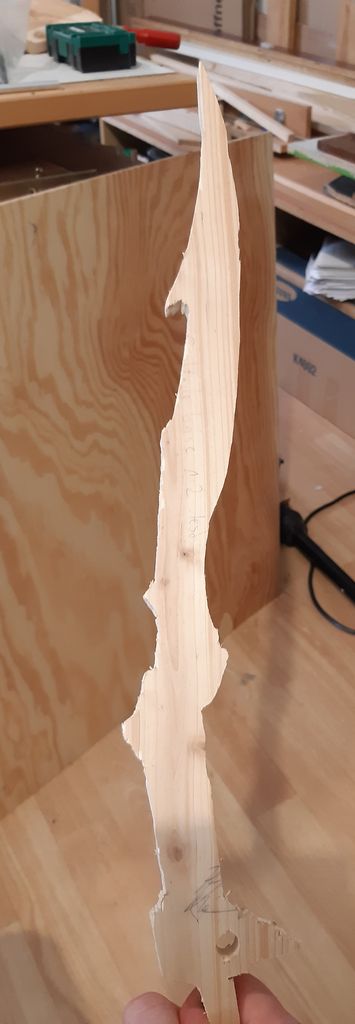
In December, I made a 1:1 wood prototype. It didn't look good but it was satisfying to hold because it weighed a lot. I also stared at my cardboard model much longer, trying to figure out how the axes that move the blade work - again. Looking back, it was probably because I didn't yet realize why the model had previously worked, which also explains why I didn't write it down. I'll skip to the point where I realized it.
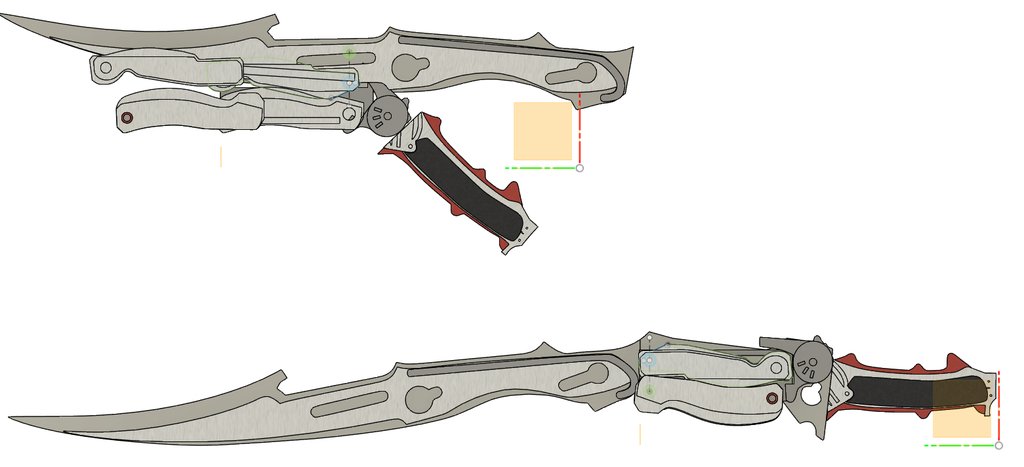
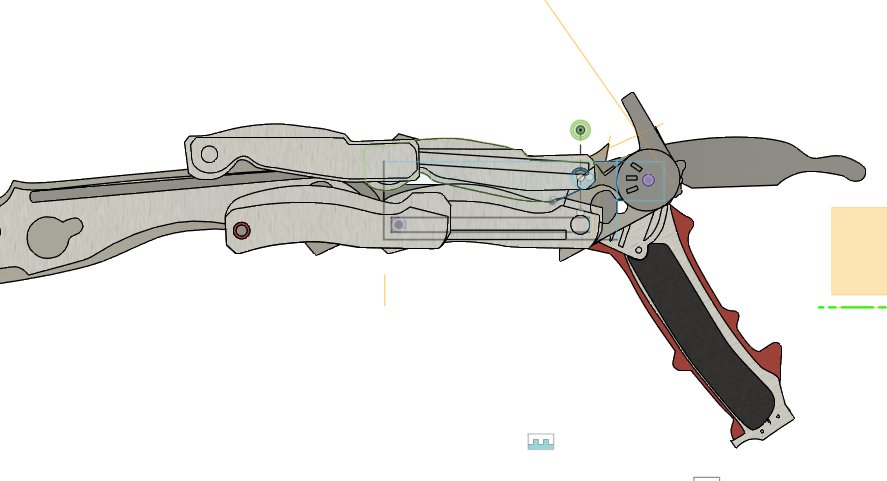
The gunblade has three axes in total. One is on the base, allowing the hilt1 to rotate to the gun position - that's the hole in the part above the hilt. The second is on the blade (connecting the blue and green part as mentioned above). The trick is the third axis, which allows the blue part (that holds the blade) to rotate as well. I always thought it was on the base, too, but it's not. It's on the part with the hole and therefore rotates around the base axis, moving it further down. This way, the blue part (blade holder) moves the blade further away from the base then its own length, allowing the blade to align with the base perfectly. That's what I could not figure out for months - The parts on the base and the blade are in specific positions relative to each other in sword form and also in gun form but I could never make it so that both would be correct after rotating. Now it works - at least in theory, actually building this thing is a topic for another article.
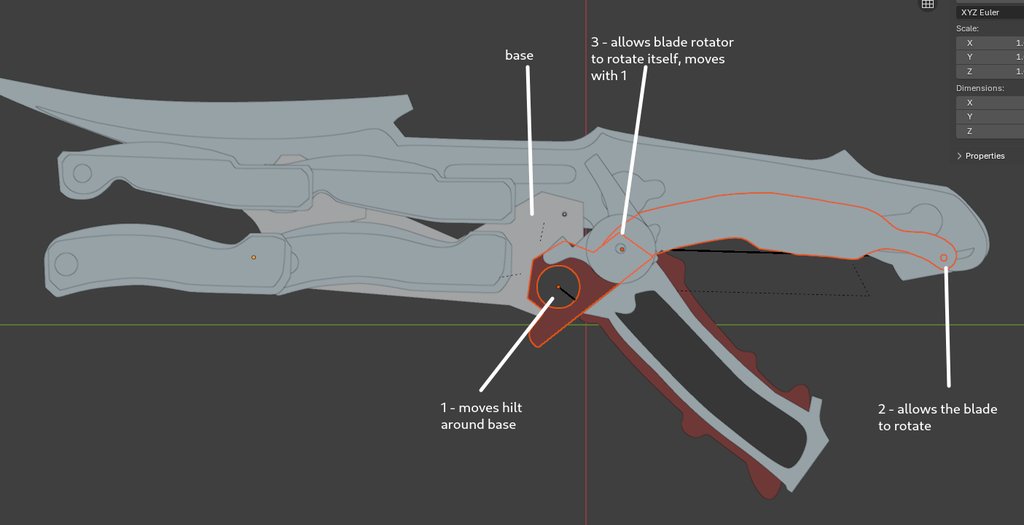
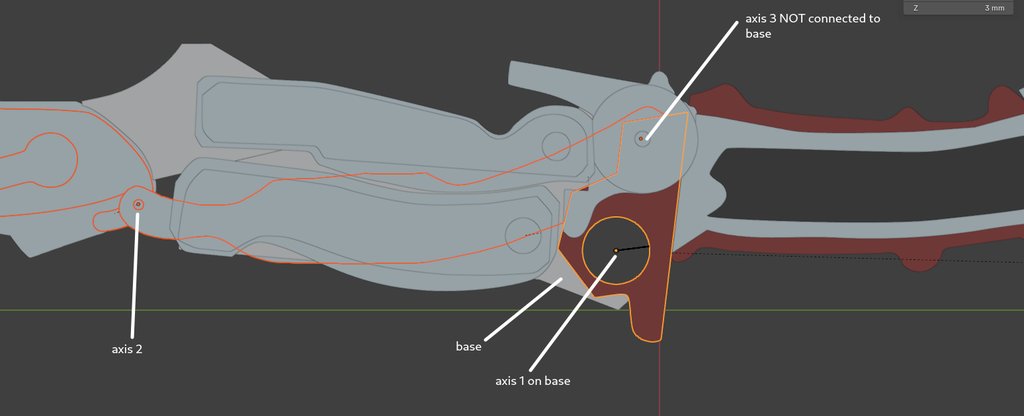
Notice the distance between the blade holder and the base in gun form (upper image). That exists because axis 3 rotates around axis 1. The above images are screenshots from Blender - I really wanted an animated model, so several iterations later, I recreated all the parts in CAD again, this time in Blender, not in Fusion. I might write something about that later, too, basically it was easier to do then in Fusion because Blender can import vector graphics more easily and nothing is real, meaning parts do not actually have to connect to each other. That also makes the animation will break more easily as Blender does not really "know" what parts are moving, what joints are and what axes are, but it is good enough for now.
From December 2023, I actually started making parts from wood. I had ambitions to be done by March 2024 to participate in Leipziger Buchmesse, one of the biggest events relevant for cosplayers2. We'll see how that went.
-
This term included some research how the grip / handle of a sword is called and if "hilt" is appropriate in the case of the gunblade, which barely resembles an actual sword. I did however decide to use it as the base actually goes into the part that you hold. ↩
-
Actually, it's called Manga Comic Con. It shares the fair halls with Leipziger Buchmesse though and they use the same ticket so nobody refers to the Cosplay and Manga/Anime part as Manga Comic Con. ↩
--
You can receive new blog posts using a feed reader and my Atom feed. If you want to talk to me, you can do so in the Fediverse. I am on Mastodon and Pixelfed. You can also write an e-mail to blog [at] konzertheld.de.